 Stan Suski of Granger Lawnmower presenting the donation of a pole saw to Larry Schmitt to use for our
conservation projects.
Many thanks to Stan and the Echo Corporation for your donation.
Jerry Darkes of Scott Rod Company will be at Leeper Park with a slew of rods to cast on the St. Joseph River. On the St. Joe River at Leeper Park in South Bend, Indiana 9:00am – 3:00pm.
Here is the SJRVFF Loop…..you need it to be in the know.
Tight Lines!
Andy
Editor
6:00 PM April 20th Annual Club Auction will be held on the 6th floor of the Chase Bank building (Same as the March Meeting- map). The money we raise is used to support the Clubʼs activities throughout the year, including the outings, fly tying classes, the stream improvements, the donations for stockings in our local waters and speakers.
BYOB
Due to a temporary technicality with its liquor license, The Cellar Door can no longer serve alcoholic beverages until further notice. Members of SJRVFF may bring in their own alcohol to consume. The Cellar Door regrets this and will inform us when the license is reinstated. As always, please drink responsibly.
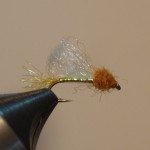
I sat down at my tying table one evening to whip up some of Dennis Potter’s Opal X Caddis for a upcoming fishing trip. I have used his Opal X Caddis pattern with great success on the Michigan and Montana streams I fish, for the past several years. When I was done I decided to try tying some Amber Iris Caddis. I had just recently purchased Craig Matthew’s and John Juracek’s “Fly Patterns of Yellowstone “ Volume 2 book, along with a sample Iris Caddis and some of their Amber Zelon dubbing. I tied several Iris Caddis per the instructions in the book, and laid them on my tying table next to the Opal X Caddis that I tied earlier. Looking at the two patterns sitting next to each other gave me the idea for the Opal Iris Caddis. I tied a few up and tried them on my area stream a few days later. The brown trout residing there gave the Opal Iris Caddis a big thumbs up!
(Click on photo to see a full size photo)
[line]
Material List
Hook: Tiemco 100 – Size #16
Thread: UTC 70D Burnt Orange
Shuck: Amber Zelon
Body: UTC Mirage Opal Tinsel (medium)
Wing: White Zelon or White EP Fibers
Head: Amber Zelon Dubbing
[line]
Tying Instructions
Tie in the amber zelon shuck about 1/3 hook shank length behind the hook eye. Wrap thread back to the bend of the hook binding down the zelon shuck, and back up to the tie in point. Trim shuck to about 1/3 hook shank length.
Tie in a length of opal tinsel at the tie in point and half hitch. Wrap opal tinsel back to hook bend and then back up to the tie in point. Bind down well, trim tinsel and half hitch. Using a rotary vise makes this step very fast and efficient. Just make sure you take care when getting close to the hook point – it will cut the tinsel and force you to start over if you are not careful!
Take a short piece of white zelon or EP fibers and fold to make a loop. Tie in the wing on the top of the hook so the loop extends to the end of the hook shank. Bind the wing down with several tight wraps and half hitch. Trim the butt fibers close and at a 45 degree angle from the hook eye.
Dub some amber zelon dubbing on your thread and dub a shaggy head covering the wing tie in. Leave enough room for a small thread head, and whip finish. The dubbed head should be kinda fat from the bulk of the wing tie in, and that is how you want it to look.
[line]
[line]
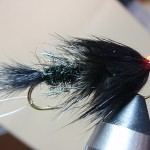
This is a Bear Andrews pattern that I learned to tie at his tying class last spring. His claims to it’s effectiveness convinced me to tie them up to use for last year’s steelhead run and I had good success with it. It is a bead head wiggle-nymph pattern and I tied them in black with orange, chartruese, and pink bead heads. Tie some up for the upcoming run and give them a try!
(Click on photo to see a full size photo)
[line]
Trailer Hook: TMC #3761 size 8 – 4
Front Hook: TMC 105 size 8 – 4
Thread: 8/0 or 70D thread to match body
Trailer Hook Body Tail: Pheasant rump feather marabou or Squirrel strip fur to match body color
Body: Black dubbing brush or Ice Dub
Hackle: Pheasant rump feather to match the body color
Collar: Pheasant rump aftershaft feather
Front Hook Body: Bead Head: 5/32 bead – orange, Chartruese, or pink
Hook Joint: 15 pound mono
Fur Head: Pine squirrel strip to match body
[line]
Tie the trailing body first. Tie in the tail of Pheasant rump feather marabou or a pinch of pine squirrel fur. Wrap a body from a dubbing brush or dub one using Ice Dub dubbing. Then tie in a pheasant feather by the tip and wrap 3 -4 times. Finally tie in the aftershaft feather and wrap to make a fluffy collar. You have tied a sparrow nymph. Now slide the bead on the front hook and tie in a piece of mono behind the bead. Bind down well, slide the trail fly on the mono, form a loop and bind down the mono again with thread. Tie in the squirrel strip at the bend of the hook and coat the thread with Fishermans glue or superglue. Wrap the squirrel strip to the bead, bind down well and whip finish.
I have had real good luck the past several years with black, brown, tan, and especially green beetles. I usually don’t start using them until the dog days of August but I think that I will start using them earlier in the season this year. I am also going to tie this pattern in a larger size to imitate the larger “June Bug” beetles that appear in the beginning of the summer in the evenings and see if the trout favor them as well.
(Click on photo to see a full size photo)
[line]
Featured Speaker: This month’s speaker will be Kevin Thomason of KVCTU.
The March meeting will be held on the 6th floor of the Chase Bank building (Same as the February Meeting). We will also have the April meeting on the sixth floor, which is the auction, to take advantage of the open area.
Due to a temporary technicality with its liquor license, The Cellar Door can no longer serve alcoholic beverages until further notice. Members of SJRVFF may bring in their own alcohol to consume. The Cellar Door regrets this and will inform us when the license is reinstated. As always, please drink responsibly.
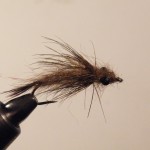
(Click on photo for a full size photo)
[line]
MATERIALS
Hook : TMC 200R Size 6 or 8
Eyes : Large mono eyes
Lead : .020 lead wire
Body : Dark brown fur
Tail : Dark brown hackle fibers
Hackle : Dark brown hackle of choice
[line]
1. Lay down a thread base on the hook back to slightly past the point where the hook bends.
2. Tie in large mono nymph eyes about ¼ of the way back from the hook eye
3. Tie in 1 piece of lead wire along each side of the hook. Each piece should be tied in behind the eyes and extend back to the point where the tail is tied in slightly past the hook bend.
4. Wrap thread back slightly past the hook bend and tie in a tail of brown hackle fibers.
5. Dub a body of dark brown fur of your choice. Dubbing should cover the back 2/3rds of the hook shank. I like to mix a little sparkle in with the dubbing.
6. Tie in and wrap hackle. The hackle can be your choice of dark brown hackle, brown dyed grizzly hackle, large grouse hackle, or brown pheasant feather (shown in picture of fly).
7. Dub the remaining 1/3rd of the hook shank, figure 8 dubbing around the mono eyes to cover the thread tie in point.
8. This fly can also be tied in Olive or a light brown/cream color (which simulates a recently molted nymph).
[line]
I have found this fly to be very effective for bass and panfish. It will also work well for trout in lakes and rivers. I will often add a small micro split shot if I need to sink it a little deeper than what the fly would sink with the weight tied in on the fly underbody. This fly can also be tied in as a dropper with a small bass or a panfish popper. I usually retrieve this fly with two shorts strips followed by a short pause. Most hits are on the pause when the nymph sinks a little.
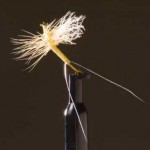
The PMD Cripple By Tim Scott
I think one of the most under rated fly fished in the late spring and early summer is the Pale Morning Dun or the Pale Evening Dun. But for argument’s sake let’s call it a Cream colored mayfly. Fly fishers sometimes don’t notice these bugs coming off the water, but boy the fish do!
They dribble off the water sporadically throughout the day and into the evening and don’t make a great show, unlike other mayflies such as a Blue Wing Olive or Brown Drake. Most fly fishers notice the tons of Caddis when in the midst of them, a cream-colored sailboat floats by. You will be surprised if you ignore the Caddis and tie on a PMD Cripple. This fly has produced some very large fish in the middle of great Caddis hatches. My experience is Trout and even Smallmouth will key on these bigger bugs with an explosive reaction. I have pulled large fish from the banks of very small creeks in our area to check out this fly and eat.
This cripple pattern was developed by Kelly Galloup. This pattern is great to fish for both the dun hatch and during the spinner fall, because cripples happen at both ends of the life cycle. You will notice two parts of this fly. First, the side-bend hook shank makes the bug look as if it is crippled. The second is the wing is on tied to one side of the fly; this represents the look of a crippled mayfly where the wings lay on the water to one side of the body. The crippled look means easy pickings and an easy source of protein to any fish.
Try this fly in the next Caddis storm and you will be surprised that the larger fish could care less for Caddis and more for your protein cripple!
PS. Yes you can tie this for any mayfly species.
(Click on photo to see a full size photo)
[line]
MATERIALS:
Hook: 12-14 TMC 100 Standard
Dry fly (hook bent to the side slightly to get a crippled fly look)
Tail: Micro Fibbets or plastic tailing material
Body: Cream Thread
Hackle: Hi-Vis tied on the side – posted – with cream hackle palmered behind the wing and to the eye – clipped on the bottom for a spinner The PMD Cripple