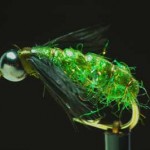
Fall Caddis By Tim Scott
If you live – well anywhere and fish – you need a good caddis pattern, or patterns. If I had only one fly to fish it would be a caddis. Everything eats them and they represent the majority of food source for trout in our waters and everywhere else. Trout will eat almost 20 caddis to one mayfly, so you better have some in your box….Elk Hair adults, emergers and of course nymphs. Here is one that works quite well.
While this pattern is designed for steelhead, this can be scaled down for trout and other fish. This is a great fly to fish during the spawning seasons. The big fish, salmon and steelhead, work the gravel throughout the river systems. When they make their redds, they kick up a lot of rock. In the mix, insects of all kinds are kicked up. Other fish behind the redds sit there and eat all the insects and eggs that float down. Hold on, you might get a 20 plus inch brown!
(Click on photo for a full size photo)
[line]
MATERIALS:
Hook #6 -#12 2457 or equivalent
Thread 140 Denier – olive
Wire Fine gold, copper wire
Shell Back 1/8 inch scud back – light olive
Body Ice Dub – caddis / insect green
Legs black wet hackle undersized
Head Black Tungsten Bead
[line]
1. Put the bead on the hook.
2. Wrap the thread back beyond the barb and down the bend. By starting your material on the bend it give the fly a curved profile.
3. Tie in the wire first then the shell back. You will fold over the shell back all the way up to the bead. The last move is to wrap the wire up to hold down the shell back.
4. Make a dubbing loop and add your ice dub into the loop. The trick to a good dubbing loop body is to distribute the ice dub evenly throughout the loop.
5. Spin up the loop and wrap the body forward to the bead. Leave a small amount of room for the wet hackle, shell back, wire and to finish the fly.
6. Take the wet hackle and tie in by the tips, make to or three wraps. The black hackle represents the legs of a caddis.
7. Split the hackle fibers away from the top of the fly; just pull them off to the sides. Then bring the shell back up over the top of the fly.
8. Tie the shell back down, between the hackle fibers and behind the bead.
9. Evenly space the wire as you wrap it forward. Watch out not to wrap down the hackle as you move forward to the bead.
10. Tie down behind the bead.
11. Whip finish
12. Go Fish!
